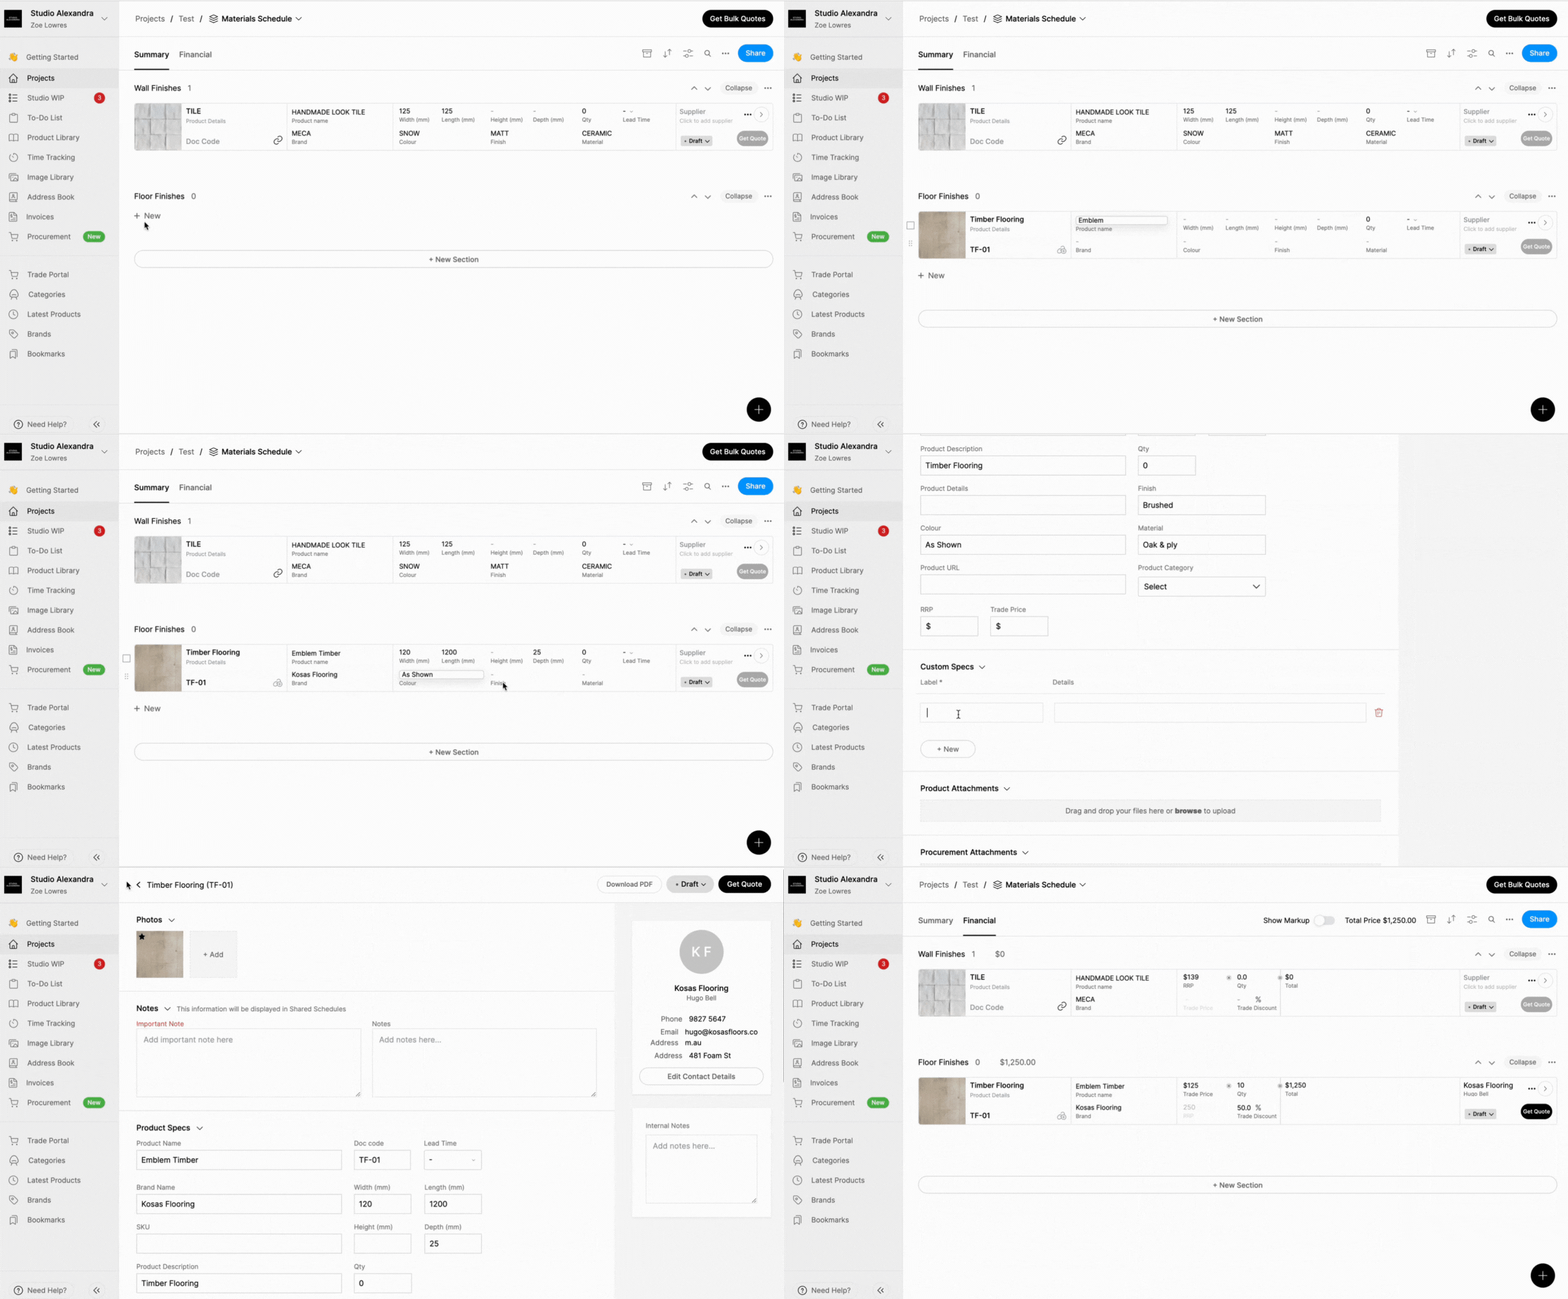
You can create a product entry from scratch if you have a custom product that isn't available on a supplier’s website.

- Hover your mouse beneath the section name and click +New.
- Select Custom Product.
- To add an image, Click the grey upload box, choose your file from your browser window and click open. Note that the Schedules will only accept JPEG, PNG, WebP and SVG file formats.
- Type the product information into the relevant fields.
- To add your supplier's contact information, click Supplier at the end of your product row. This will open an editing window for you to input their contact information. Note that these details will also be saved to your Programa Address Book for future use.
- To upload product attachments, add notes or custom specifications, click the > button at the end of your product row to open the Product Detail view.
- To add pricing information, click the Financial tab at the top of your schedule to open the financial view. You can apply an optional markup to your products by switching on the Show Markup toggle at the top of your schedule.
⏭️ Start Lesson 4: by exporting a Programa Schedule.
